Extending Ghidra: Setting up a Development Environment
Overview
This post is the first in a series of posts to discuss and review how to extend and augment Ghidra for firmware analysis.
Ghidra is a software reverse engineering tool developed by NSA. If you are familiar with IDA-Pro, r2, or Binary Ninja, you are already likely familiar with Ghidra. While one can use any of the above for reverse engineering, Ghidra is quickly gaining traction in the SRE community because it is open source and has a well-documented API for scripting and analyzing binaries. Ghidra is also growing with contributions from the community; most notably for me was the addition of the Infineon Tricore architecture to the list of supported CPUs.
Throughout your reverse engineering efforts, you may find yourself wanting to augment or extend Ghidra by writing additional plugins or scripts when dealing with embedded systems and bespoke firmware image formats. You may also want to debug some of the applicable pre-existing scripts or scripts that others have developed. Setting up a proper development environment lets you easily export processor modules and scripts, making them more accessible for other people.
Note: If you're not familiar with reverse engineering / Ghidra, you may find this course helpful!
Goals
With this post, I hope to explain how to set up a development environment for the latest Ghidra release on Ubuntu 20.04. After following the steps outlined below, we will have the ability to write, debug and export custom Ghidra plugins, modules, and scripts.
Prerequisites
If you wish to follow along with this post, prepare the following:
- Ubuntu 20.04 VM
- Eclipse
- Docker
- Follow install instructions here
- Java
sudo apt install openjdk-11-jre openjdk-11-dbg
Building Ghidra
We will be basing this tutorial on the latest release version of Ghidra; at the time of writing, this is 10.2, and this is the newest commit. To build Ghidra, we will use dukebarman's ghidra-builder. This docker container will assist us in the process of building Ghidra. Follow the steps below to build the latest version of Ghidra.
- Install docker on your host machine following these instructions
- Clone the ghidra-builder repository, and follow the build instructions as shown below:
git clone git@github.com:dukebarman/ghidra-builder.git
cd ghidra-builder
cd workdir
sudo ../docker-tpl/run ./build_ghidra.sh
When you run these commands, you might see the following error:
FAILURE: Build failed with an exception.

* Where:
Build file '/files/ghidra/build.gradle' line: 29

* What went wrong:
A problem occurred evaluating root project 'ghidra.'
> Requires at least Gradle 6.4, but was run with 6.0

* Try:
Run with --stacktrace option to get the stack trace. Run with --info or --debug option to get more log output. Run with --scan to get full insights.

* Get more help at https://help.gradle.org

BUILD FAILED in 43s
- Update the Dockerfile
To fix these, we need to update the version of Gradle used by the docker container and the environment variable used to reference Gradle. Locate the following lines in the Dockerfile and modify them as shown below
dev@ubuntu:~/tools/ghidra/ghidra-builder$ git diff docker-tpl/Dockerfile
diff --git a/docker-tpl/Dockerfile b/docker-tpl/Dockerfile
index 6391c29..9ccf7fa 100644
--- a/docker-tpl/Dockerfile
+++ b/docker-tpl/Dockerfile
-RUN wget https://services.gradle.org/distributions/gradle-6.0-bin.zip -P /tmp
+RUN wget https://services.gradle.org/distributions/gradle-7.3-bin.zip -P /tmp
-ENV GRADLE_HOME=/home/dockerbot/gradle/gradle-6.0
+ENV GRADLE_HOME=/home/dockerbot/gradle/gradle-7.3
- Update
build_ghidra.shto build the GhidraDev project
Before we try to build Ghidra again, we need to make a few other modifications. In addition to building Ghidra, we also want to generate the Ghidra Eclipse plugin. Integrating this plugin with Eclipse allows us to launch Ghidra from Eclipse, giving us the ability to debug our plugins and scripts.
We can generate the Eclipse plugin when building Ghidra by adding the following lines to the workdir/build_ghidra.sh script after the gradle buildGhidra line:
Gradle prepDev
Gradle eclipse -PeclipsePDE
- Run the Docker container, building Ghidra and the GhidraDev Eclipse project
rm ghidra.bin
cd ../
sudo workdir-tpl/build
cd workdir
sudo ../docker-tpl/run ./build_ghidra.sh
With these modifications, ghidra will properly build within the docker container, and the results can be found in the out directory as shown below:
dev@ubuntu:~/tools/ghidra/blog/ghidra-builder/workdir$ ls out/
ghidra_10.2_DEV_20211221_linux_x86_64.zip
Before moving on to configure Eclipse with our GhidraDev extension, we will unzip our freshly built Ghidra to the workdir directory:
dev@ubuntu:~/tools/ghidra/blog/ghidra-builder/workdir/out$ unzip -q ghidra_10.2_DEV_20211221_linux_x86_64.zip -d ../
dev@ubuntu:~/tools/ghidra/blog/ghidra-builder/workdir/out$ ls ../
build_ghidra.sh  ghidra  ghidra_10.2_DEV  out  set_exec_flag.sh
At this point, we now have generated the following:
- Ghidra 10.2
- Ghidra's eclipse projects/plugins (located in the
ghidra/GhidraBuild/EclipsePluginsfolder)
If you're following along, your workdir directory should look like this:
dev@ubuntu:~/tools/ghidra/blog/ghidra-builder/workdir$ ls
build_ghidra.sh  ghidra  ghidra_10.2_DEV  out  set_exec_flag.sh
dev@ubuntu:~/tools/ghidra/blog/ghidra-builder/workdir$ ls ghidra/GhidraBuild/EclipsePlugins/
GhidraDev  GhidraSleighEditor
Next, we need to build these Eclipse plugins and then install them.
Configuring Eclipse for Ghidra Development
First, we need to install Eclipse; you can get the latest release here
In the previous section, we generated the project for the GhidraDev Eclipse plugin. Next, we need to import the GhidraDev project into Eclipse and build it. Before we do that, however, we need to install the following Eclipse plugins:
- Eclipse CDT (C/C++ Development Tooling) 10.4 (2021-09)
- PyDev Python IDE for Eclipse 9.2.0
- Eclipse Plugin Development Environment
To install the plugins, open Eclipse and navigate to Help > Eclipse Marketplace, the following window will appear:
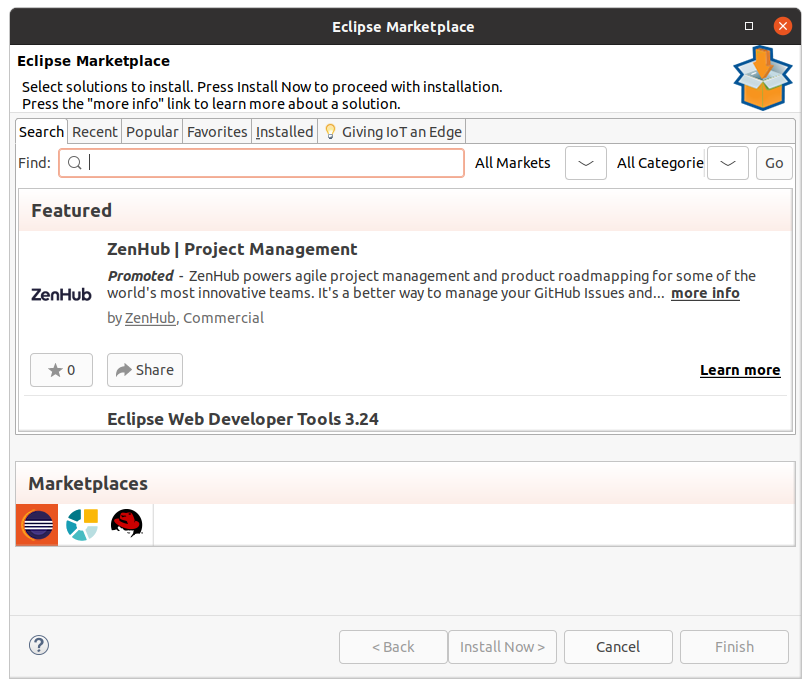
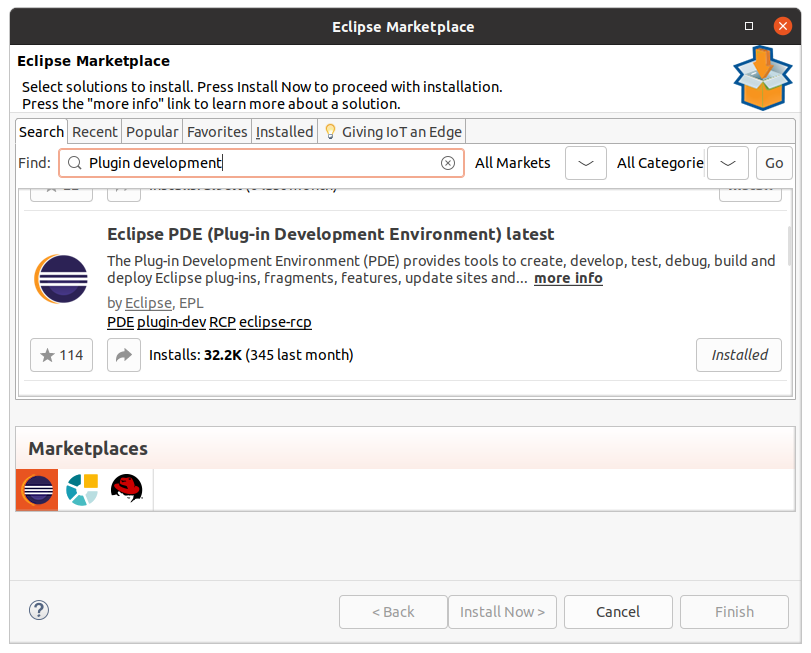
First, install the Eclipse plugin development environment by typing Plugin development in the search bar and installing what is displayed in the images below:
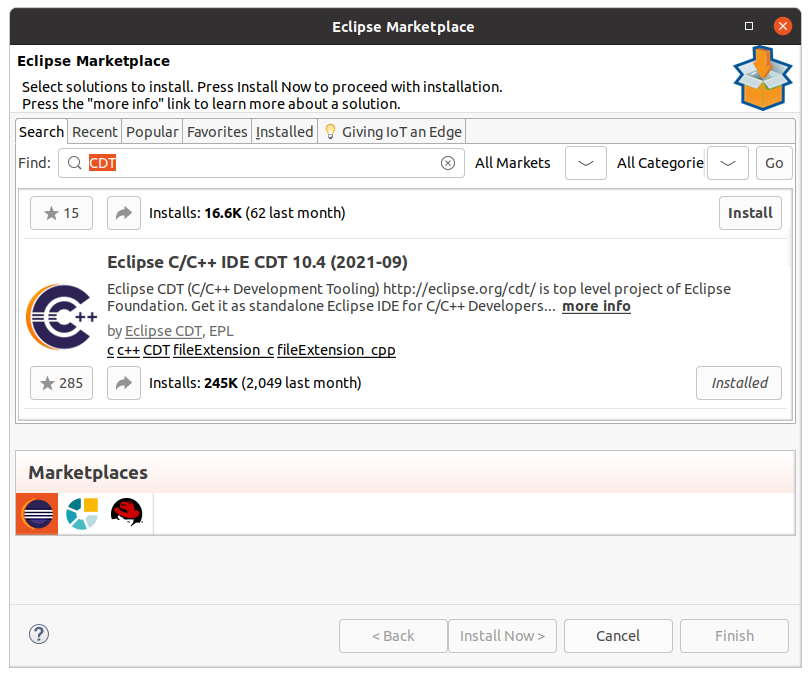
Next, we need to install the C/C++ development plugin. Type CDT in the search bar, and install the plugin shown below:
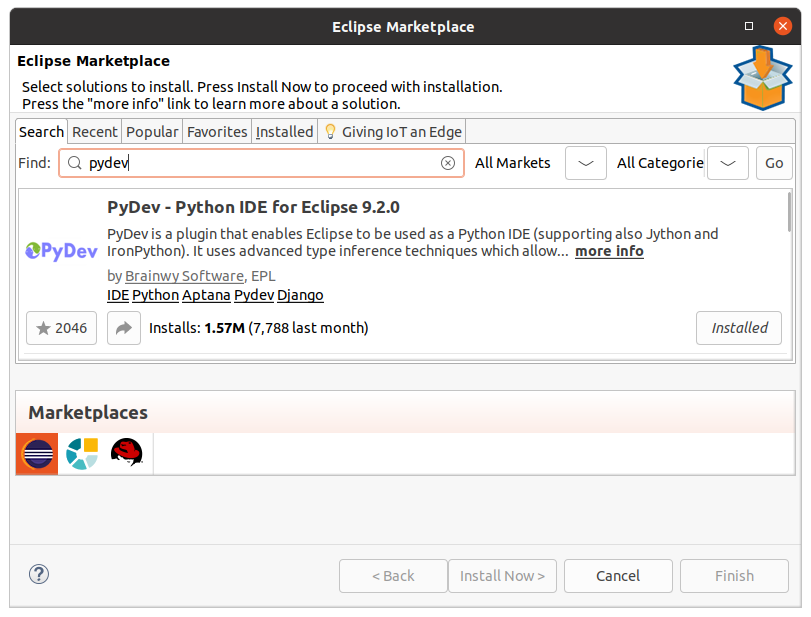
Next, we need to install the PyDeV plugin:
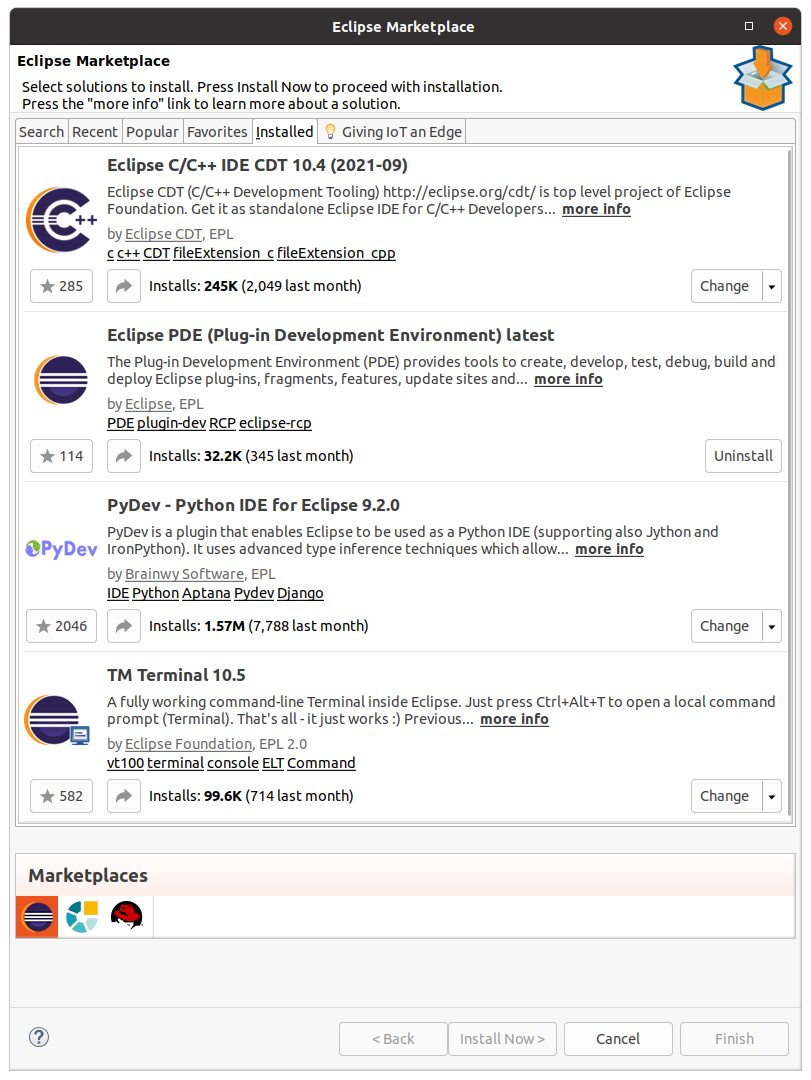
After installing these three plugins, your installed plugins window should match what is shown below:
Building and Installing the GhidraDev Plugin
We can now import the GhidraDev plugin into Eclipse with the plugins installed. Once the plugin is imported, we will export it and install it in Eclipse, allowing us to launch Ghidra from Eclipse and debug our various plugins and scripts.
First, we import the GhidraDev project into Eclipse; this will be in your ghidra/GhidraBuild/EclipsePlugins folder. To import the project, navigate to the following menu:
File > Import > General > Existing Projects into Workspace
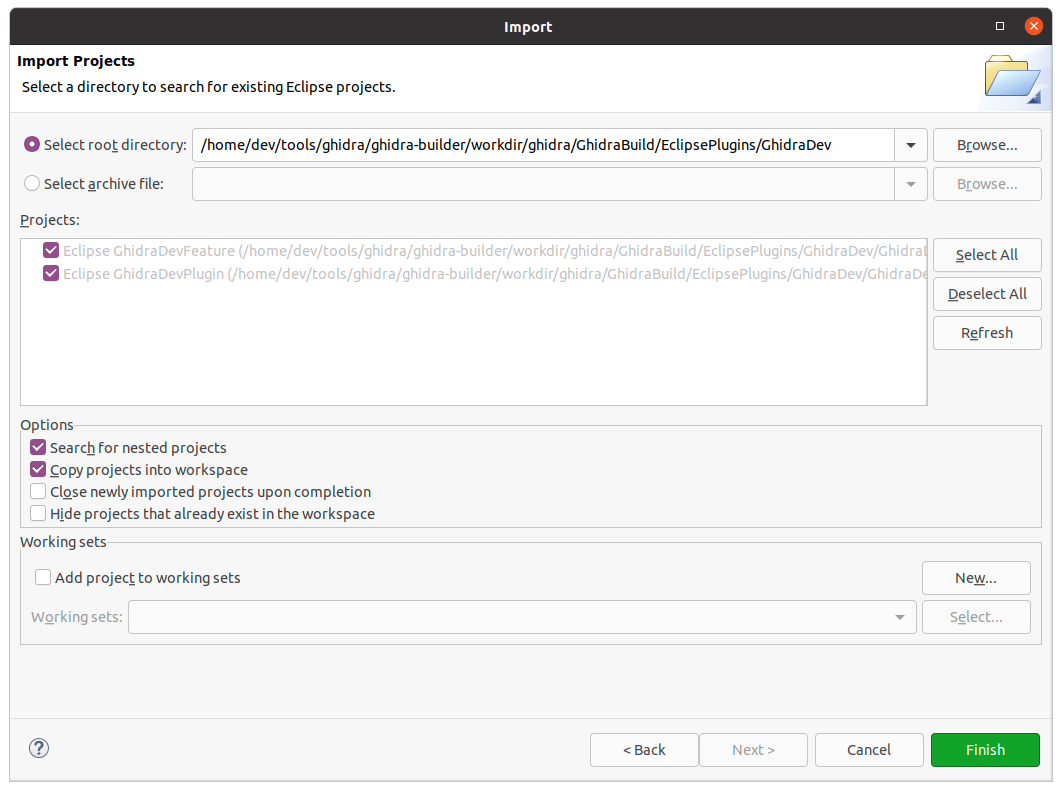
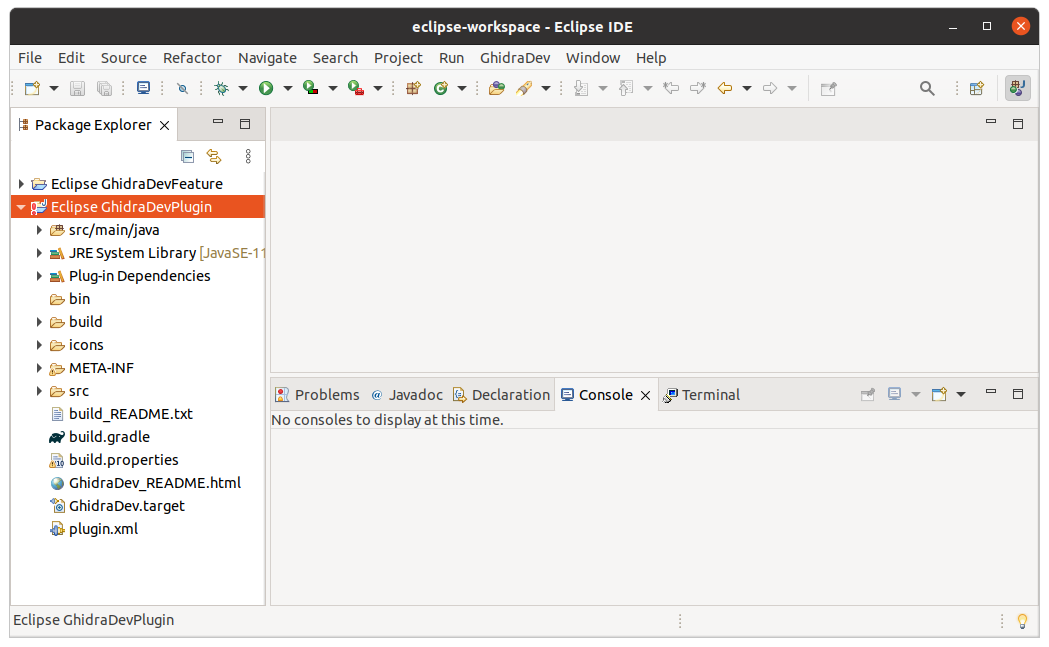
After importing the projects, your Eclipse window should look like this, with the EclipseGhidraDevFeature and EclipseGhidraDevPlugin projects displayed:
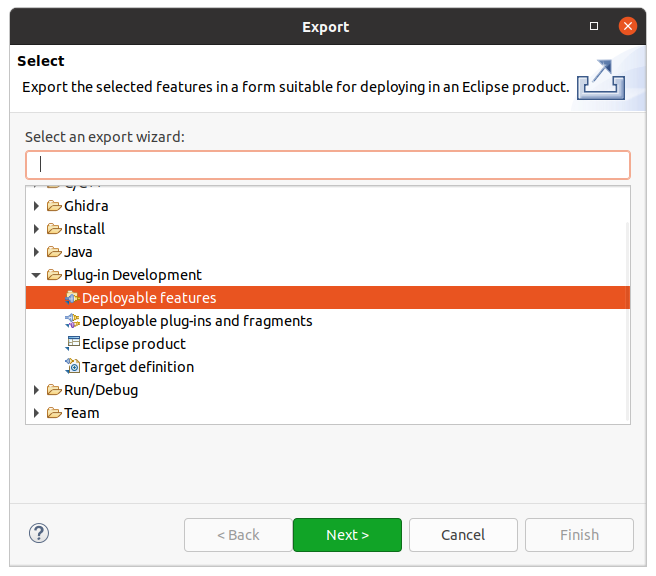
Now that the project has been imported and built, we need to export it. To do that, navigate to the following menu:
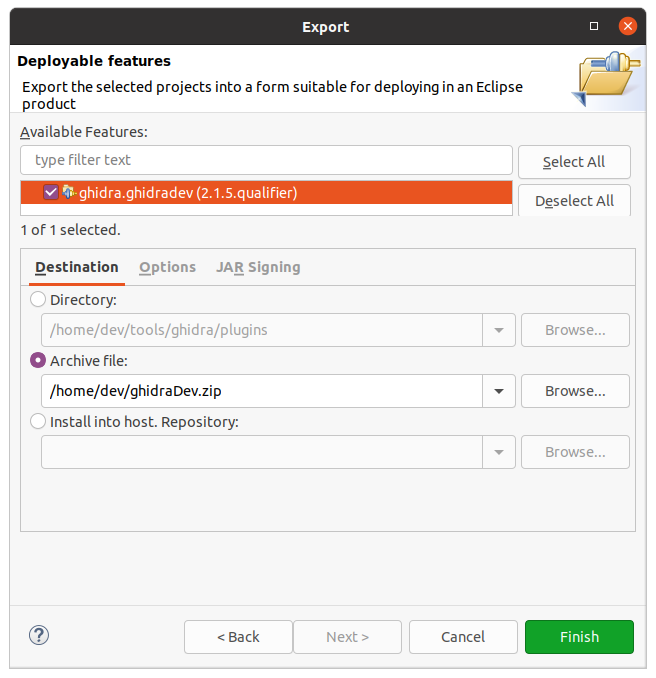
File > Export > Plug-in Development > Deployable Features
From this window, select the ghidra.ghiradev feature in the checkbox and specify a location for the archive to be exported; in the window shown below, I have set that to /home/dev/ghidraDev.zip. Please note this location because, in the next section, we will be importing this archive into Eclipse!
Now that the plugin has been exported, we can install it in Eclipse. Do this by opening the following window:
Help > Install New Software

Click the Add button, which will cause the following window to appear:
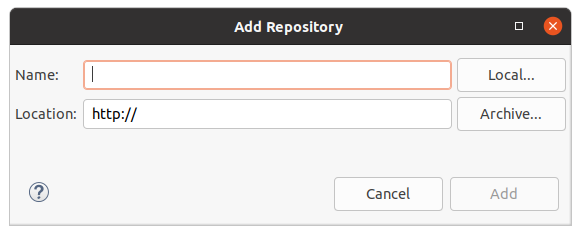
Next, we will load the previously generated archive by clicking on the Archive button. Then, navigate to the location where you exported your ghidraDev.zip file in the previous steps and select it.
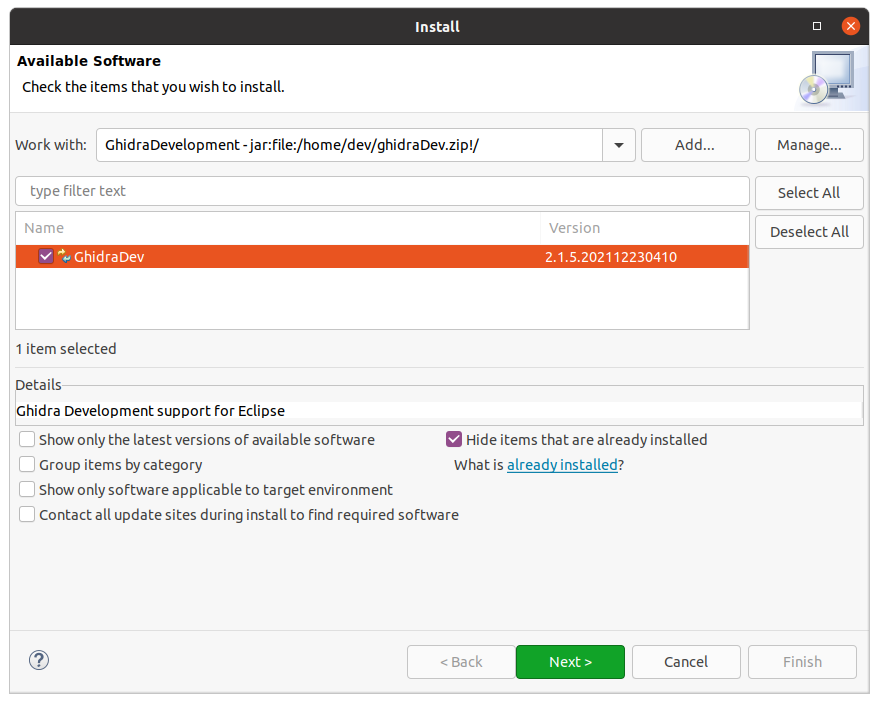
Click next to install the plugin; once the installation is finished, you will be prompted to restart Eclipse, do this, and upon restart, you will see the GhidraDev menu option in the top menu.
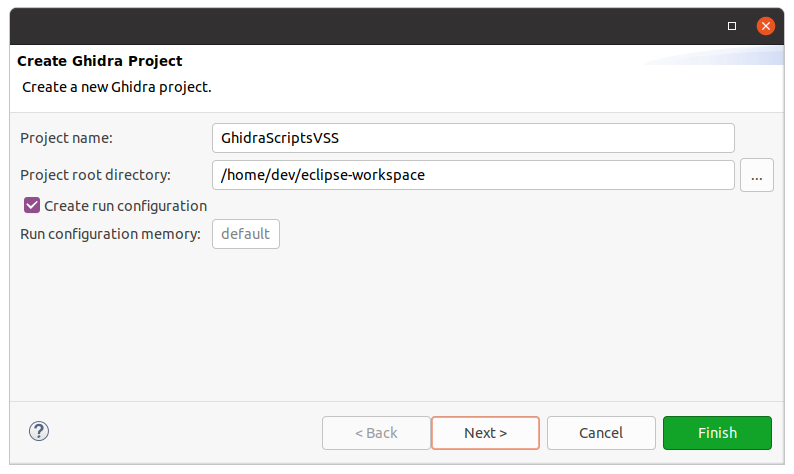
Now that we have installed the plugin, we can generate our first Ghidra Script project; to do this, navigate to the following menu:
GhidraDev > New > Ghidra Script Project
Select a name for your project; I'll use GhidraScriptsVSS for this example.
Click next to continue project configuration and then click next on the following window:
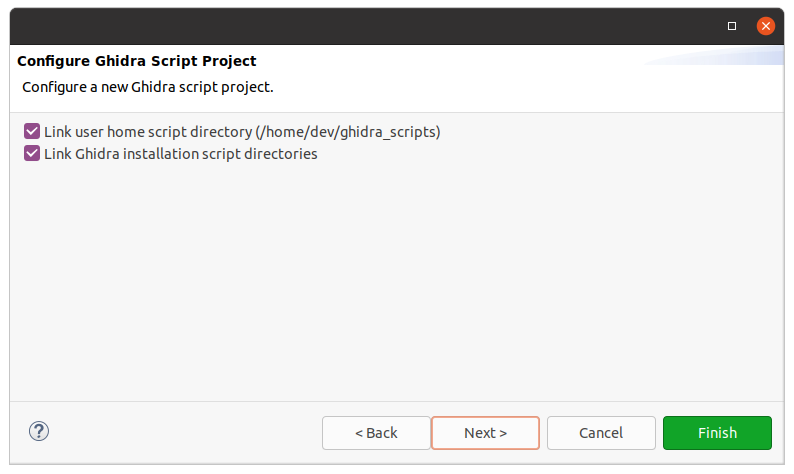
Next, we need to link our current Ghidra installation; if you followed the previous steps and built Ghidra in the docker container, this will be our ghidra_10.2_DEV directory that we extracted earlier.
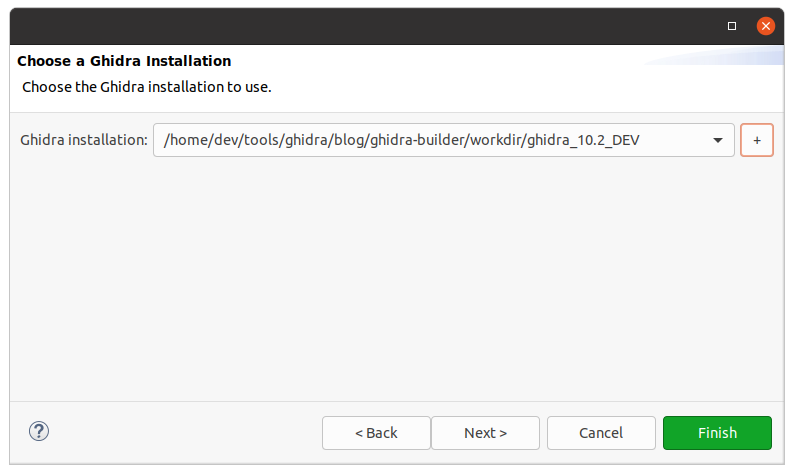
Next, you can enable Python support using the Jython interpreter bundled with the Ghidra installation pointed to in the previous section.
The Ghidra project will show up in your Eclipse projects, and we can add our first script!
Using the GhidraDev Plugin
In a previous post on my blog, I wrote a Ghidra script to analyze ARM thumb mode binaries (Game Boy Advance ROMs are excellent test targets!), with a focus on finding function prologues. Let's load download that script and run it against a new binary.
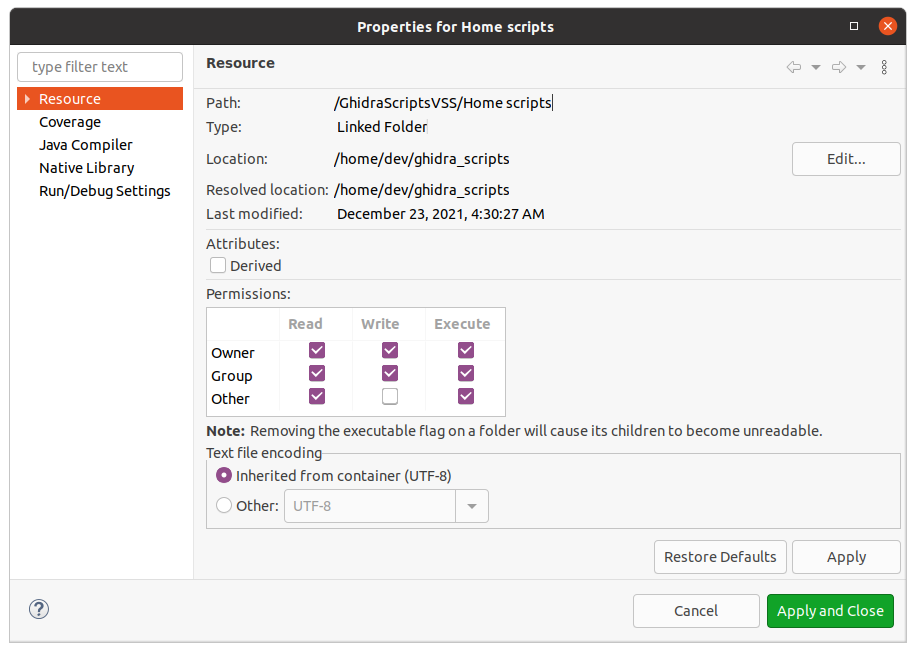
To add a new Java file to our project, download the MakeFunctionsScriptGBA.java file and copy it into the project location. In my case, this is in the ~/ghidra_scripts directory. If you do not have that directory, you can determine the location by right-clicking on the Home Scripts folder in the project directory and clicking Properties causing the following window to appear:
After downloading the ghidra-utils repository and copying the function discovery script into our project directory, we can now see the script in our Eclipse workspace.
Let's take this script and run it on another ROM image from a different game; this time, we will use Monster Rancher Advance as a test case.
We can launch this script in Ghidra by right-clicking on the script in the project explorer and clicking
Run As > Ghidra

This will cause the previously linked Ghidra installation to launch. Once it launches, we will select our target binary and then open up the Script Manager window by clicking Window > Script Manager displaying the following:
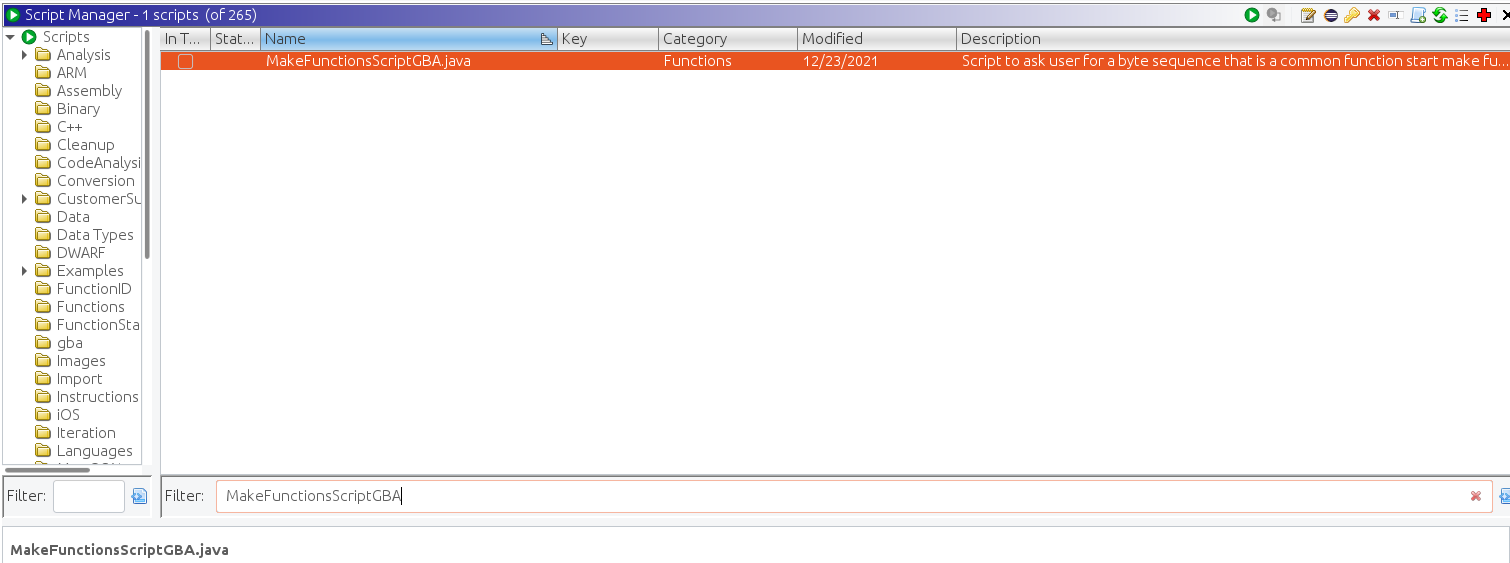
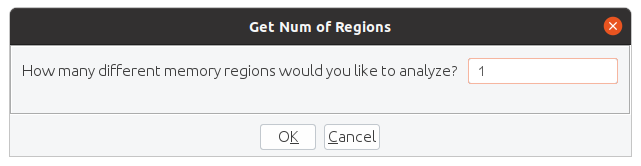
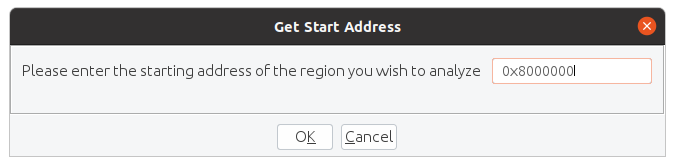
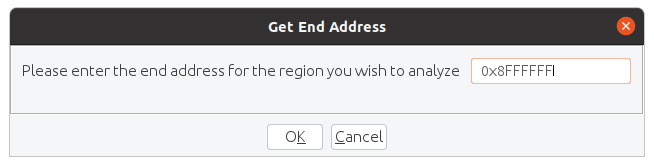
We can locate our script by typing it into the search bar; we can double click it to launch it on our new unanalyzed ROM. Below are the parameters I ran the script with; we will run it over the entire ROM and denote the results.
After entering the third option, the script will run and look for functions in the ROM image. For this example, the script was able to identify 240 functions.
If we wanted to modify or debug this script as it is running, we can now easily do that within Eclipse.
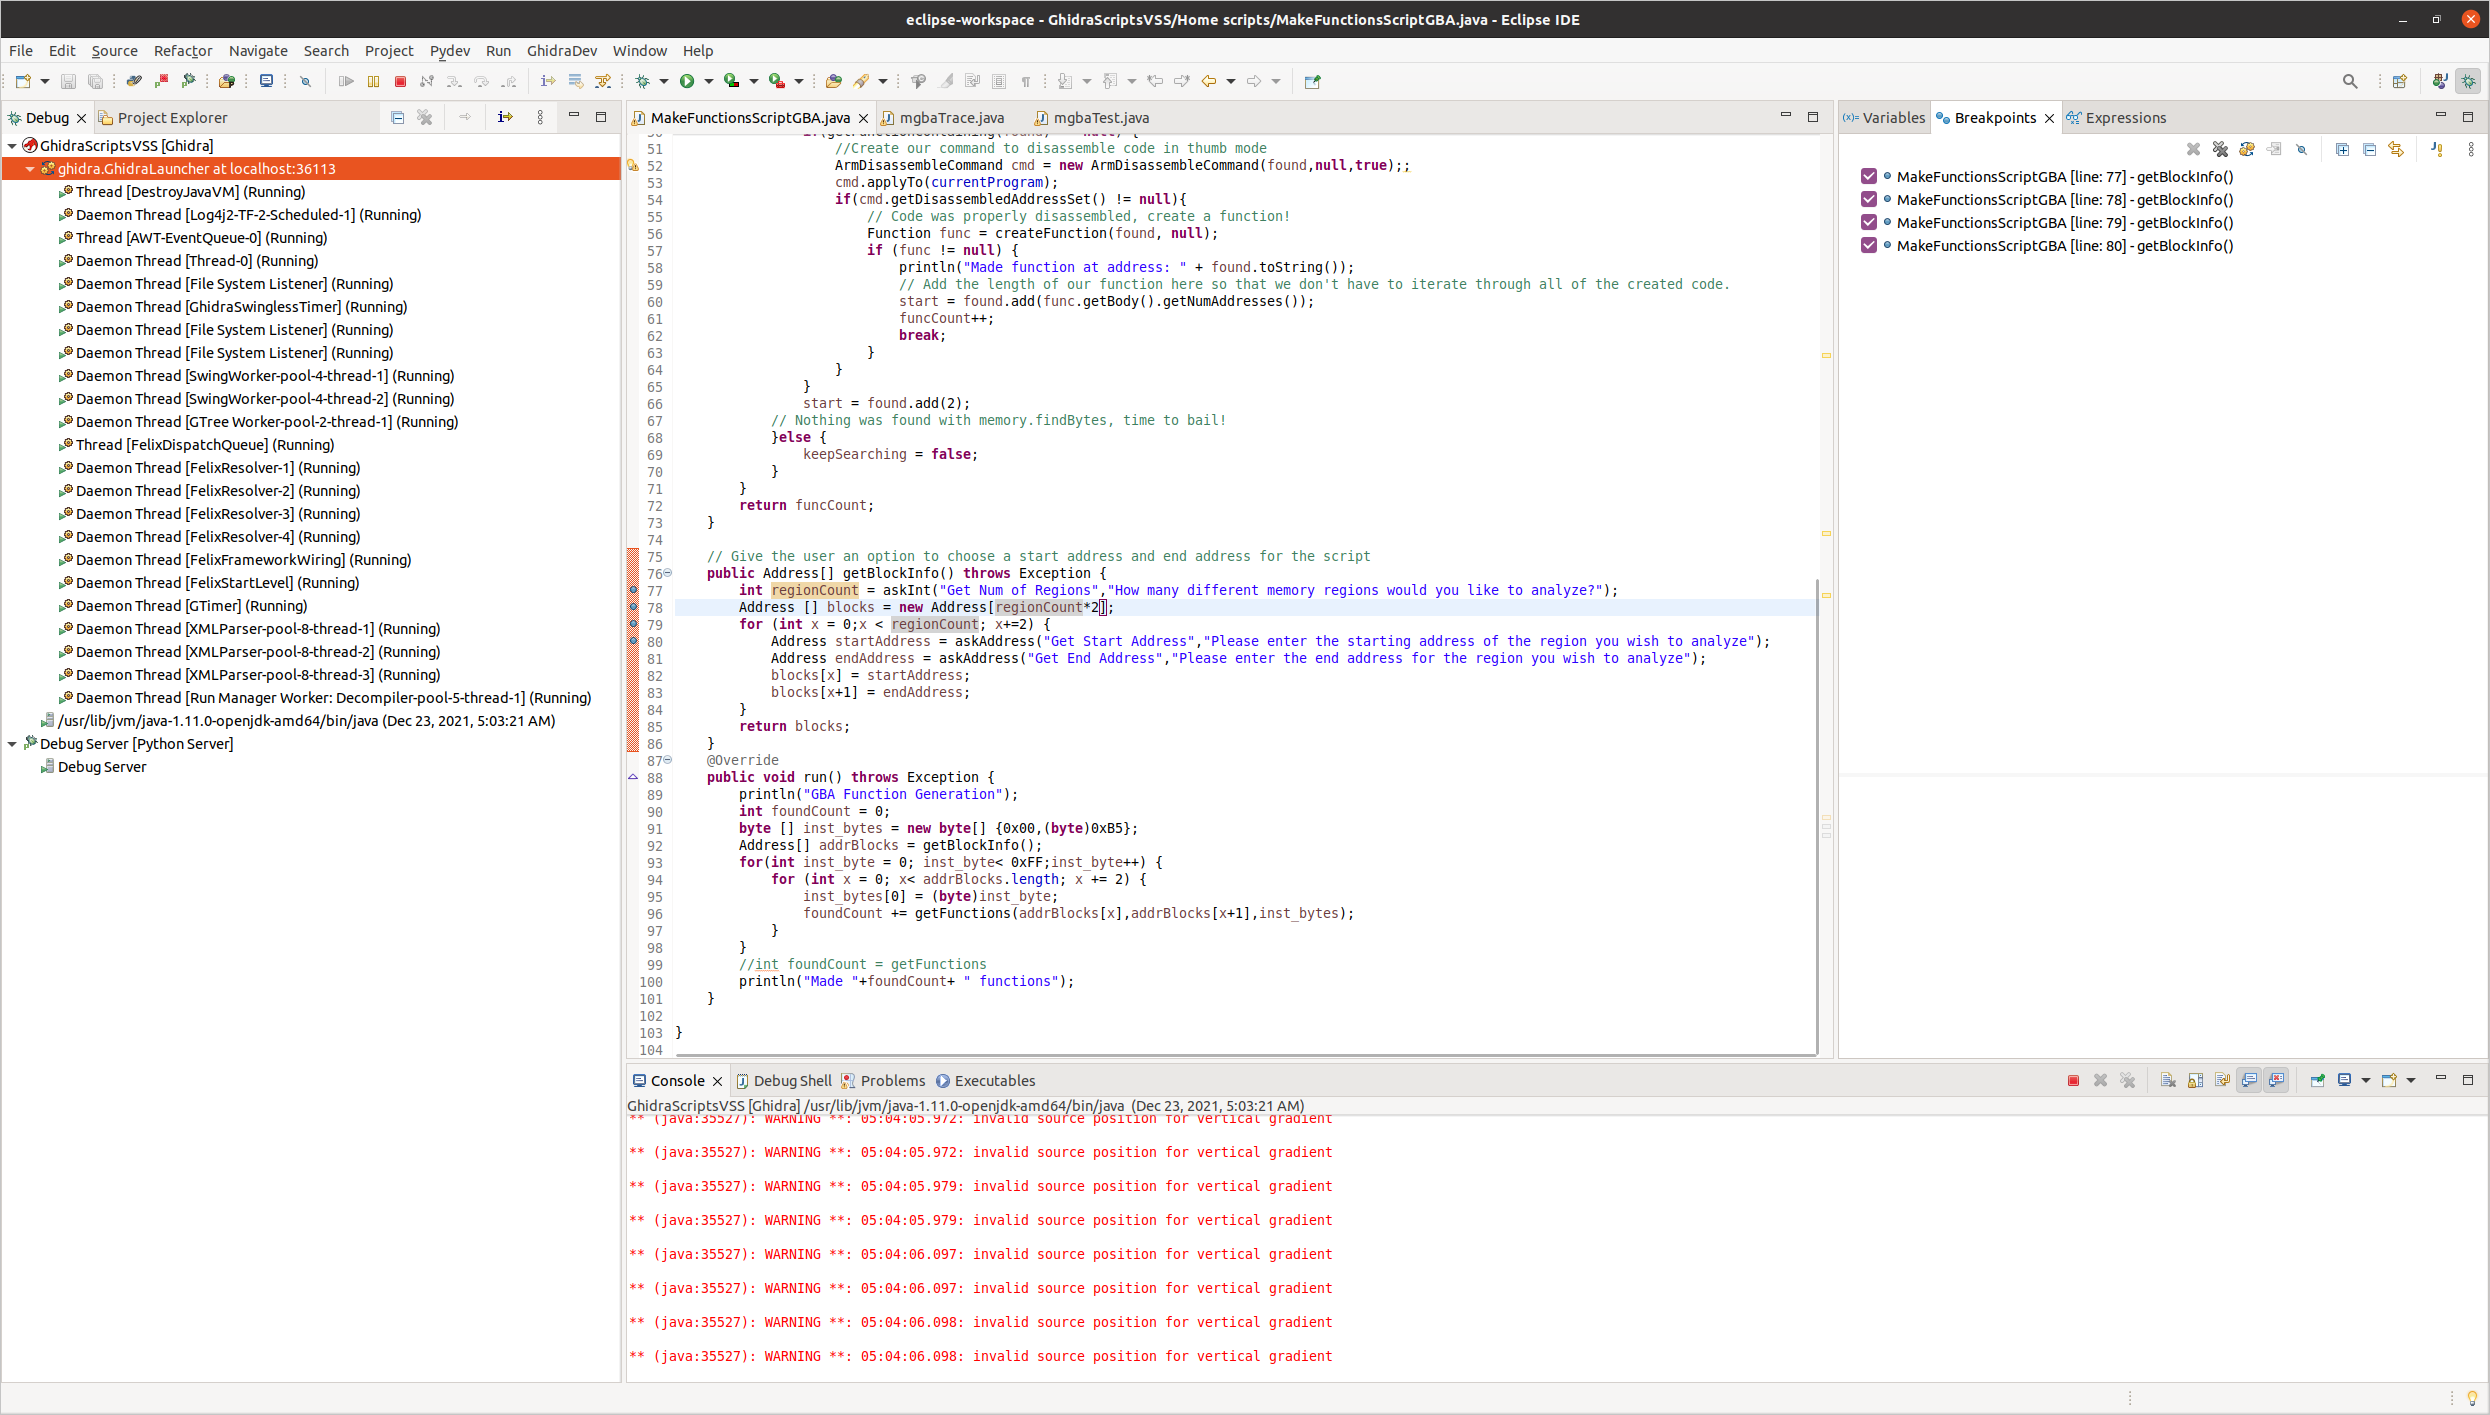
Let's say we wanted to break after the user inputs the number of memory regions they wish to analyze. To do this, we can go to the relevant line in our script and set a breakpoint by double-clicking the line number. We also will need to relaunch Ghidra using the Debug As option in the project manager.

When we launch Ghidra in debugging mode, Eclipse will appear as follows:
Now, if we rerun the script from Ghidra, the following will occur:
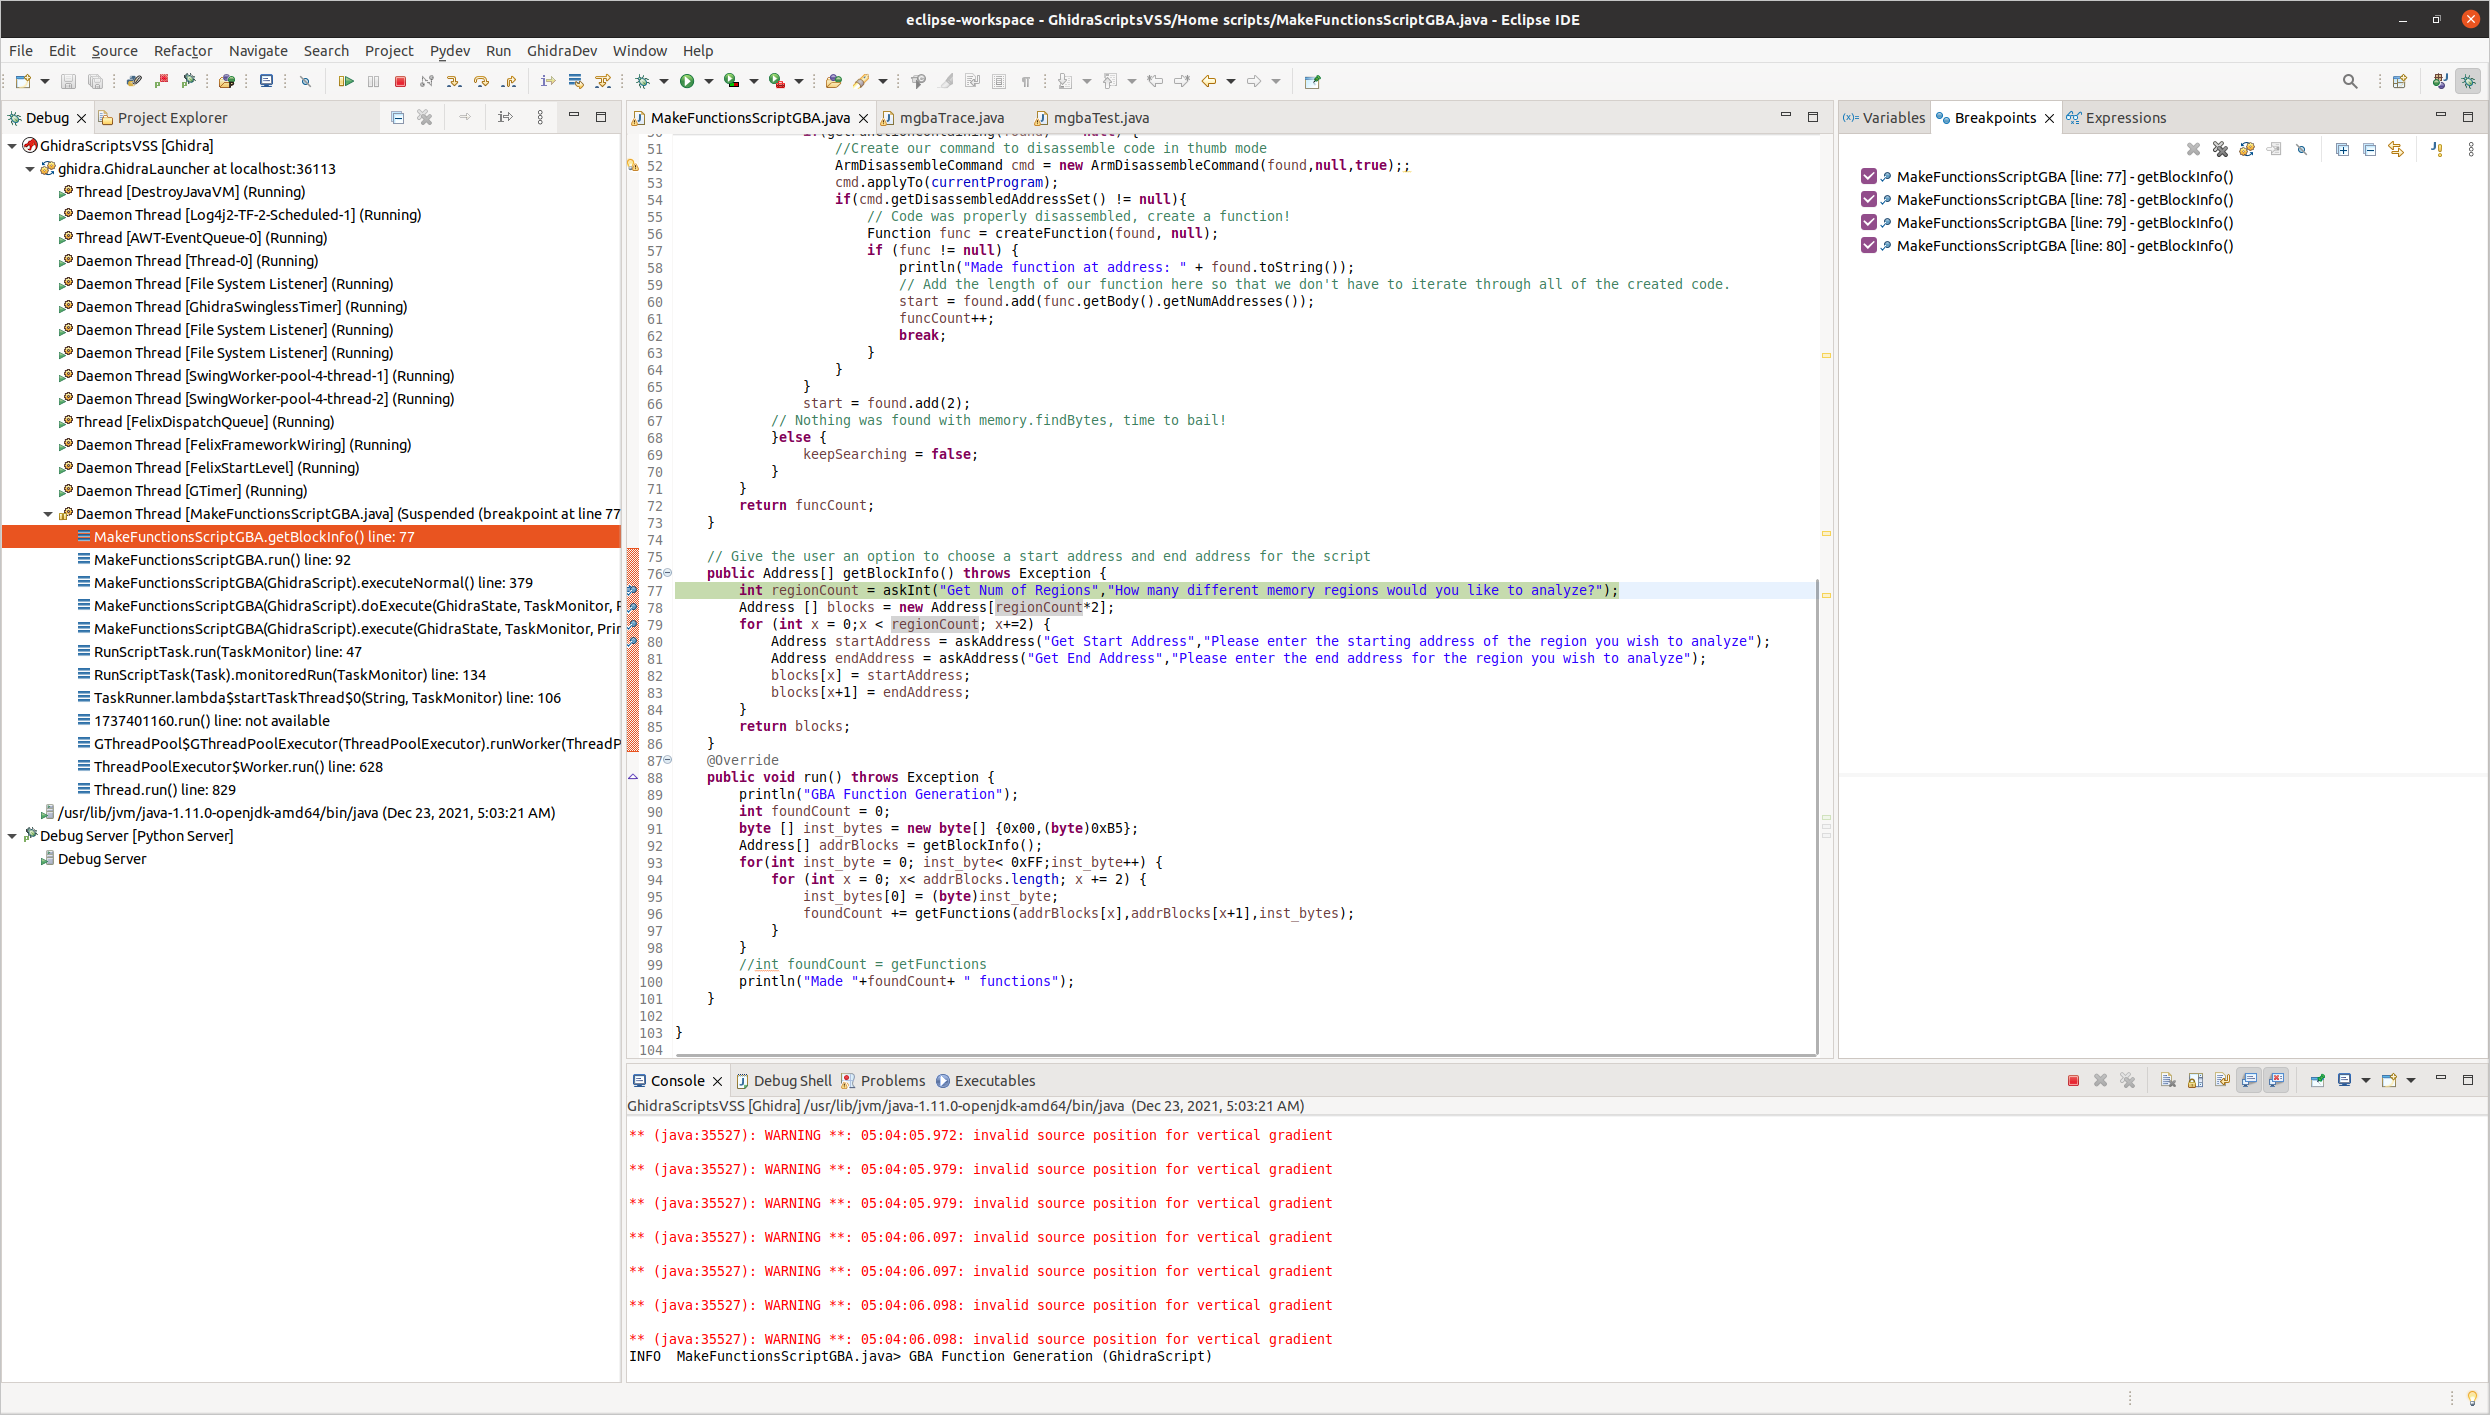
We can see that our breakpoint hit, allowing us to single-step through our script. In addition, debugger integration helps debug our scripts and step through other scripts to help us understand how they work.
Using the GhidraDev plugin, we can set breakpoints, log more information, and run our script in Ghidra.
Conclusion
With this post, we have reviewed how to:
- Build the latest version of Ghidra using docker
- Set up an Eclipse development environment for extending Ghidra
- Build and install the GhidraDev plugin
- Load a Ghidra script into an existing project and debug it using Eclipse
With this, we now have all the tools in place needed to extend and augment Ghidra. For some examples of what can be done through Ghidra scripting, check out the following posts:
If you would like to learn more about Ghidra, check out this course that I authored at hackaday. - Github Repository - YouTube Playlist - Hackaday Page
As always, if you have any questions about this post or would like to submit any corrections or steps that I have missed, please feel free to reach out to me via Twitter or email and let me know!
Patches / References
- Patches for Ghidra builder
dev@ubuntu:~/tools/ghidra/ghidra-builder$ git diff docker-tpl/Dockerfile
diff --git a/docker-tpl/Dockerfile b/docker-tpl/Dockerfile
index 6391c29..9ccf7fa 100644
--- a/docker-tpl/Dockerfile
+++ b/docker-tpl/Dockerfile
@@ -33,10 +33,10 @@ USER dockerbot
 # Build tools are part of the builder image; project code is mounted
 RUN mkdir -p $HOME/.gradle/init.d/

-RUN wget https://services.gradle.org/distributions/gradle-6.0-bin.zip -P /tmp
+RUN wget https://services.gradle.org/distributions/gradle-7.3-bin.zip -P /tmp
 RUN unzip -d $HOME/gradle /tmp/gradle-*.zip

-ENV GRADLE_HOME=/home/dockerbot/gradle/gradle-6.0
+ENV GRADLE_HOME=/home/dockerbot/gradle/gradle-7.3
 ENV PATH=$GRADLE_HOME/bin:$PATH

 RUN echo "\
dev@ubuntu:~/tools/ghidra/ghidra-builder$ git diff workdir/build_ghidra.sh
diff --git a/workdir/build_ghidra.sh b/workdir/build_ghidra.sh
index 50d350d..dbe9494 100755
--- a/workdir/build_ghidra.sh
+++ b/workdir/build_ghidra.sh
@@ -17,7 +17,8 @@ cd $START_DIR/ghidra
 gradle --init-script gradle/support/fetchDependencies.gradle init
 gradle yajswDevUnpack
 gradle buildGhidra
-
+gradle prepDev
+gradle eclipse -PeclipsePDE